Get Started
Adding More Lines

Windows 10,8,7,Vista,XP
- Download the Visual Outliner:
- Save it to the Desktop or other download folder
- Run the installer file (double-click on it)
- Open the Visual Outliner once it gets installed
- You can then start a new outline by either:
•
Clicking on the editor area to start a new line
•
Clicking the "Plus" button (top toolbar, second button from the left)
•
Selecting "Item" -> "Add Item" from the menu
•
Typing the "Ins" key on your keyboard
•
Clicking the "Plus" button
•
Selecting "Item" -> "Add Item" from the menu
•
Typing the "Ins" key on your keyboard
- Once you are done with writing your first line, you can enter a new line by just typing "Enter"
- Other Alternatives:
- Other Alternatives:
Adding a Line on Top of the Current Line
- Move the text cursor to the beginning of the line
- Type "Enter"
- This action will push the current line down and add a new blank line on top of it
- Type "Enter"
- This action will push the current line down and add a new blank line on top of it
Click a Line to Select it for Editing and Other Actions
- Click on a line to select it
- You can now type more text, delete text, or copy and paste text
- You can also do other actions like:
- Demote a line (increase indentation) by either:
- Pressing "Tab"
- Clicking the "Shift Right" button
- Pressing "Ctrl + Right Arrow"
- Promote a line (decrease indentation) by either:
- Pressing "Shift + Tab"
- Clicking the "Shift Left" button
- Pressing "Ctrl + Left Arrow"
- Move the line Up*:
- Clicking the "Move Up" button
- Pressing "Ctrl + Up Arrow"
- Move the line Down:
- Clicking the "Move Down" button
- Pressing "Ctrl + Up Arrow"
- Delete line:
- Clicking the "X" (remove) button
- Menu: Edit -> Delete
- "Ctrl + D"
- Or simply hitting the "Del/Delete" key on your keyboard
*note: if a child line reaches a parent line while moving it up, you'll have to promote it to the parent level to keep moving it further up
Special Selection Mode for Moving Lines
- If you want to move lines using drag and drop,
- or if you want to select multiple lines,
- or if you want to copy and paste lines
=>there is a special line selection mode that needs to be activated
As usual, you can accomplish it in more than one way:
- or if you want to select multiple lines,
- or if you want to copy and paste lines
=>there is a special line selection mode that needs to be activated
As usual, you can accomplish it in more than one way:
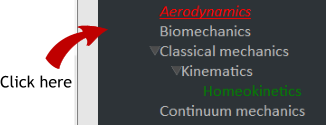
- Click close to left edge of the outline row, as show on the figure above
- This will show the selection marker, as shown on the figure below:
- This will show the selection marker, as shown on the figure below:

- You can click and drag the selection marker to move the line around and drag it to a different location
- You can send the line to The Bucket by:
- Dragging the line to The Bucket
- Clicking the "Send to Bucket" button
- Pressing the "Shift + Right Arrow" keyboard shortcut
- You can also do Copy, Cut and Paste of the entire line by using the special selection mode mentioned above by selecting:
- Menu -> Edit -> Copy or Menu -> Edit Cut
- and then Menu -> Edit Paste
- or with the keyboard shortcuts "Ctrl+C", "Ctrl+X" and "Ctrl+V"
note: you have to choose the new insertion point by using the process mentioned above before pasting the selected line
select -> Copy (Ctrl+C) -> select new position -> paste it
- You can remove the selected line by:
- Clicking the "X" (remove) button
- Menu: Edit -> Delete
- "Ctrl + D"
- Or simply hitting the "Del/Delete" key on your keyboard
Alternative ways to select a line (special selection mode):
- Beside using the mouse, you can also:
- Use the menu to select a line:
- Menu: Edit -> Select Row
- Use keyboard shortcuts:
- "Shift + Space" to select
- "Shift + Backspace" to deselect
- or even "Shift + Up Arrow" to select
Multiple Line Selection
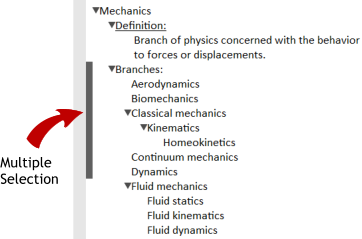
- You can select multiple lines by clicking close to the left edge of the outline, as mentioned above. Then drag the mouse up or down along the edge (without releasing the mouse button, until you reach the end your selection):
1. Click and hold close to the left edge
2. Drag up or down to select more lines
3. Release the mouse button once your selection is complete
You should see this:
1. Click and hold close to the left edge
2. Drag up or down to select more lines
3. Release the mouse button once your selection is complete
You should see this:
- You can accomplish the same result by using the keyboard, once a row is selected for editing (see section above) you can:
- Hit "Shift + Up Arrow" to select the same line in Special Selection Mode
- Without releasing the "Shift" key, keep hitting the "Up Arrow" to select more lines above
- You can also do the opposite:
- Hit "Shift + Down Arrow" to select multiple lines below
- Hit "Shift + Up Arrow" to select the same line in Special Selection Mode
- Without releasing the "Shift" key, keep hitting the "Up Arrow" to select more lines above
- You can also do the opposite:
- Hit "Shift + Down Arrow" to select multiple lines below
The Bucket
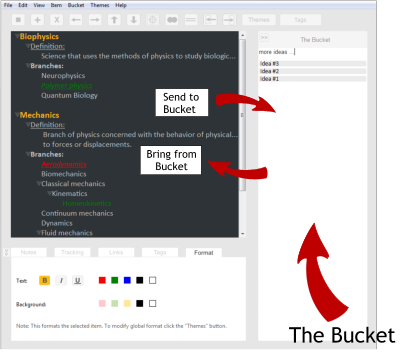
- "The Bucket" is a temporary storage area that you can use for quick brainstorming and collection of ideas and thoughts.
- Send outline lines to The Bucket by selecting them using the special selection mode mentioned above, and then by either:
- Dragging and dropping them into The Bucket
- Clicking the "Send to Bucket" button
- Menu: Item -> Send to Bucket
- or the keyboard shortcut "Shift + Right Arrow"
- To bring thoughts and ideas from The Bucket into the outline you should click on a Bucket row to select it and then either:
- Drag it from the Bucket to the outline
- Click the "Bring from Bucket" button
- Menu: Item -> Bring from Bucket
- or the keyboard shortcut "Shift + Left Arrow"
- You can enter new ideas and thoughts into the bucket by:
- Selecting the field under "The Bucket" heading
- Typing your ideas and hitting "Enter"
- The Bucket Features:
- You can save and store multiple Buckets for later use
- Menu: Bucket -> Save
- You can import other Buckets into the current Bucket
- Menu: Bucket -> Import
- To clear The Bucket
- Menu: Bucket -> Clear
The Utility Pane
The Utility pane is located close to the bottom of the window, just under the outline editor
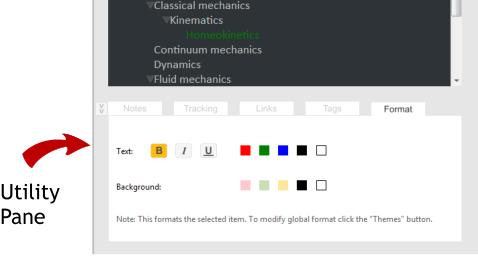
Format:
Allows to apply local format to the outline lines (it overrides the global theme format). It can be used to emphasize your entries, apply color code.
E.g. useful for status monitoring
This should be done today
This was due yesterday
This has been completed
Links:
Quickly access your files, folders or websites associated with your outline entries
Tracking:
Use the outliner as a to do list and keep track of tour progress
Notes:
Add useful comments and observations to your outline entries
Show/Hide "The Bucket" and the Utility Pane
You can make the outline editor area bigger by hiding "The Bucket" and the Utility Pane
To Hide / Show "The Bucket":
- Click the Bucket's Show/Hide button (see below)
- Menu: View->Hide Bucket or View->Show Bucket
- or hit Ctrl+1 to toggle it
To Hide / Show "The Bucket":
- Click the Bucket's Show/Hide button (see below)
- Menu: View->Hide Bucket or View->Show Bucket
- or hit Ctrl+1 to toggle it

To Hide / Show the Utility Pane:
- Click the respective Show/Hide button
- Menu" View->Hide Properties or View -> Show Properties
- or hit Ctrl+1 to toggle it
- Click the respective Show/Hide button
- Menu" View->Hide Properties or View -> Show Properties
- or hit Ctrl+1 to toggle it
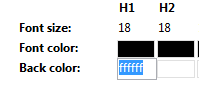
The Theme Composer
The theme composer is an easy to use, straight forward tool that can quickly help you build your own outline theme.

- You can modify any property by just clicking on it (left-click)
- Selecting a style than has borders will allow you to select the border color
- Feel free to create, export and import themes
- Trick:
- you can enter new colors by using the color palette (left-click)
- or by entering its color code (right-click)
- Selecting a style than has borders will allow you to select the border color
- Feel free to create, export and import themes
- Trick:
- you can enter new colors by using the color palette (left-click)
- or by entering its color code (right-click)
Tag Filtering
- Click on the "Tags" button (top toolbar) to activate the tag filter
- Select your tag
- The outliner will only show lines that include your tag
- The "Tags" button will turn to yellow, to emphasize that the tag filter is active
- You can edit lines and change its properties when the filter is on
- You cannot move lines while the filter is on. Disable the filter to be able to select and move lines
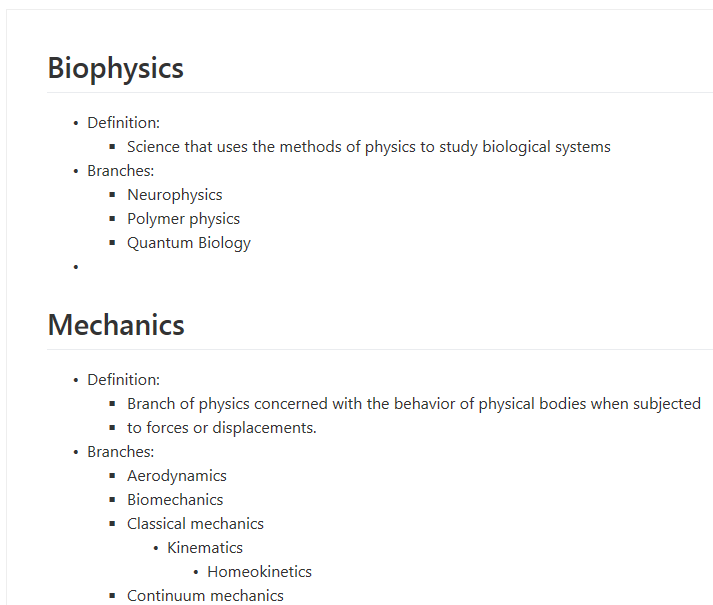
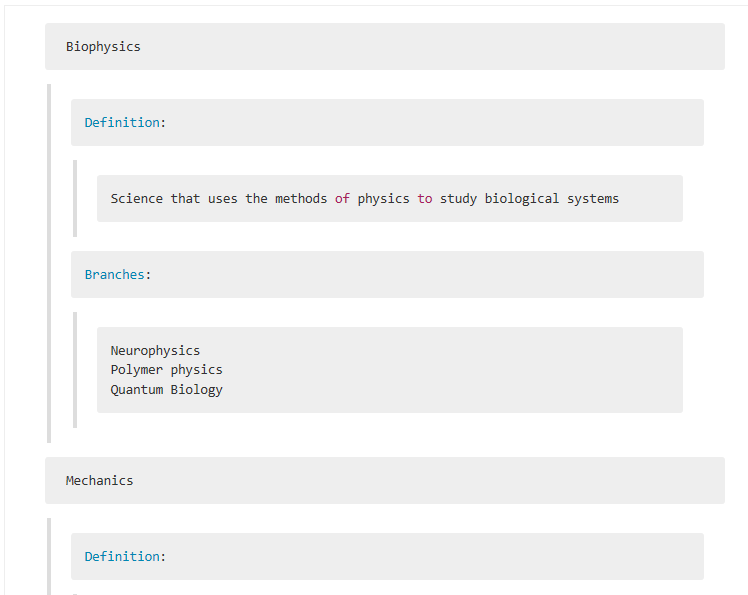
TXT, HTML and MD (markdown) Export Formats
The Visual Outliner saves the outliner as OPML format. That means that the content can be easily migrated to other software tools.
Other than that, the Visual Outliner can also export its contents as text (.txt), html and markdown formats. Below are two examples of exported markdown files.
Other than that, the Visual Outliner can also export its contents as text (.txt), html and markdown formats. Below are two examples of exported markdown files.
Deselect Lines
To deselect lines:
- if edit selection (highlighted line):
- press the "Esc" key on your keyboard
- if special selection mode (side bar marker):
- click on the marker, or
- press the "Esc" key on your keyboard, or
- Menu: Edit -> Deselect Rows, or
- hit "Ctrl + Backspace" on your keyboard
- if edit selection (highlighted line):
- press the "Esc" key on your keyboard
- if special selection mode (side bar marker):
- click on the marker, or
- press the "Esc" key on your keyboard, or
- Menu: Edit -> Deselect Rows, or
- hit "Ctrl + Backspace" on your keyboard
- Click on a line to select it
- You can now type more text,
delete text, or copy and paste
text
- You can also do other actions
like:
-> Demote a line (increase
indentation) by either:
- Pressing "Tab"
- Clicking the "Shift Right"
button
- Pressing "Ctrl + Right Arrow"
-> Promote a line (decrease
indentation) by either:
- Pressing "Shift + Tab"
- Clicking the "Shift Left"
button
- Pressing "Ctrl + Left Arrow"
-> Move the line Up*:
- Clicking the "Move Up"
button
- Pressing "Ctrl + Up Arrow"
-> Move the line Down:
- Clicking the "Move Down"
button
- Pressing "Ctrl + Up Arrow"
-> Delete line:
- Clicking the "X" (remove)
button
- Menu: Edit -> Delete
- "Ctrl + D"
- Or simply hitting the
"Del/Delete" key on your
keyboard
Windows 10,8,7,Vista,XP